Completely new to homebrewing? Have quite a few beers under your belt? Both new and intermediate brewers can take their beer to the next level with just a few technique tweaks or equipment upgrades. Here are our top 5 ways to make your beer better.
![]()

Fermentation Temperature Control
Yeast accounts for up to 70% of your beer’s flavor, so it’s important to keep it happiest (and hungriest) in its ideal temperature range to get the right fruity esters or spicy phenolics you’re looking for and no off-flavors. Ale yeast works best around room temperature, while lager yeast thrives in cooler temps (45 - 55F).
How can you make sure you stay in the ideal temperature range? To keep your beer cozy, find a spot in your house that is consistently in the ideal fermentation range - maybe it’s the sunny spot your cat is usually occupying. A heating pad or even swaddling your fermenter in a blanket like a precious newborn baby can help raise the temp a few degrees. To go cooler, a low tech solution is to use the swamp cooler method. Place your fermenter in a basin filled with water and wrap a towel around it. Then point a fan at it to help cool it via evaporation. If you want to get a bit more high tech, consider building a fermentation chamber with a fridge or chest freezer paired with temperature control.

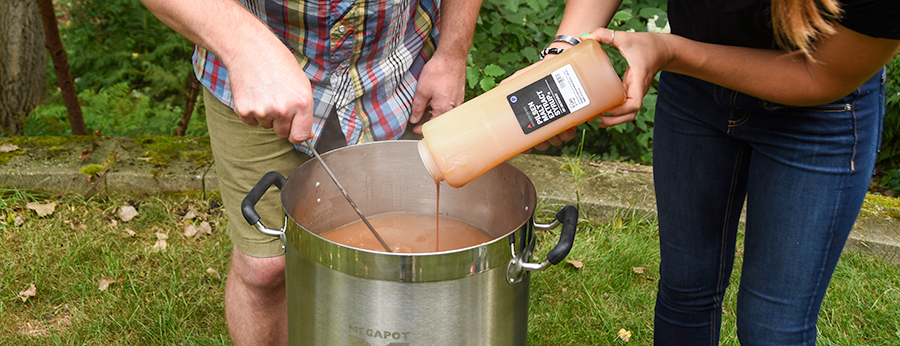
Pitch the Right Amount of Yeast!
Over pitching, or adding too much yeast, isn’t too likely and doesn’t cause as many issues. Under pitching, or not adding enough yeast, is significantly more common. If you don’t add enough yeast, fermentation may not finish - or if it does, it may not provide the best flavors. Yeast isn’t foie gras, it’s not going to taste better when forcing it to eat up all the sugar. Overworked yeast won’t have enough energy to go back and consume the off-flavors they create and won’t eat up the sugar to carbonate your beer (if bottle conditioning) so not only could your beer be off-flavored or too sweet, but also flat.
You can avoid this by making a yeast starter to increase your yeast cell count. If you haven’t done this, it’s essentially a mini beer. You’ll combine water, dry malt extract, and yeast the day before brewing to increase your yeast cell count and get them moving around, ready to do their job once poured into your brew.

Oxygenation
Love that wet-cardboard type of flavor in your beer? Good news, you can skip this section! But if this is a flavor you’d like to avoid, it’s best to know when NOT to introduce oxygen to your beer. Adding it right after you’ve cooled your wort (before adding the yeast) is essential to avoid effects similar to under-pitching. Yeast need oxygen to replicate, so think of oxygen as a necessary ingredient to create your very own yeast orgy… well an asexual orgy at least. No oxygen, no yeast orgy. Which will lead to low cell counts and poor fermentation.
So how can you help the yeast party? One method is to simply shake or rock your carboy. However, even when done aggressively, rocking achieves a lower oxygen level than what’s ideal; around 2 parts per million (8-10 ppm is the goal). The best way is with an oxygenation kit - pure oxygen with a sintered stone - which can add 9ppm of oxygen in a mere 60 seconds. Read more about aerating your wort here.

Full Volume Boil
Does your beer have a distinctive “homebrew” flavor? Maybe you haven’t noticed it because brewing beer that tastes like beer feels like such a big accomplishment and at first we don’t notice that tang of sweeter-than-it-should-be in our beer. In smaller 2-3 gallon boils, sugars condense and cause kettle caramelization, darkening, and more complex sugar formations (slightly bigger sugars), and sometimes the yeast cannot eat them. This leads to a slightly sweeter beer than what you’re targeting. Increasing your boil size doesn’t cause that darkening and it spreads your sugars out into little bite sized pieces that your yeast can more easily eat up. Hops also react differently in different depths of sugar and this way you’ll get more balance and a much better beer at the end. And another added bonus of leveling up: you reduce your risk of adding contaminants since you don’t need to top off your batch with water after the boil.

Actively Chill Wort
If you do go to a full volume boil, your kitchen sink really isn’t going to cut it anymore for cooling down your wort. Wort chillers save you time, create a better cold break by getting the proteins out of suspension (creating more clarity and less haze to your beer) and it prevents contamination; the sooner you get your wort into the fermenter, the sooner the yeast can eat up sugar.
You have two options (because we’re not counting a bathtub full of ice here). An immersion wort chiller goes directly inside your wort and chills it without cold water coming in direct contact with your wort. A counterflow wort chiller pushes wort and cold water against each other to exchange heat and cool the wort in one pass. It’s an efficient and rapid way to cool wort, especially once you’re making 10+ gallon batches.
Sound Easy Enough?
Don’t feel overwhelmed by thinking you need to implement all of these at once - you’ll be amazed at how applying even a couple of these tips can improve your beer. There are countless variables to brewing, and the best part of experimenting with your brews is you’ll always be rewarded with beer and the opportunity to learn and make even better beer next time.
Read more about homebrewing basics:
How to Make Beer: the 4 basic steps.
Brewing Terms You Should Know: a comprehensive list.
21 Homebrewing Lessons I Wish I'd learned Sooner: tips and tricks of the trade.
Northern Brewer Homebrewing Starter Kit Buyer Guide: which kit is right for you.
Northern Brewer University: Online Video Training Courses.