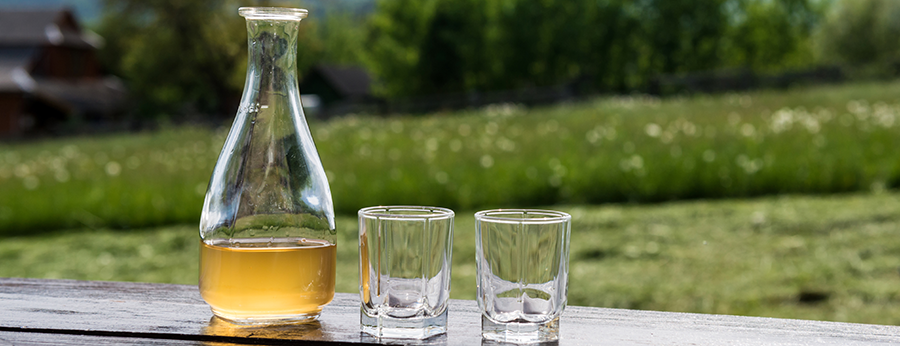
Maybe you have Scandinavian blood running through your veins or you’ve just watched Eric Northmen and Ragnar Lothbrok down mead from a horn and were inspired to do the same. Drank by Vikings and their Norse Gods, sometimes even referred to as Nectar of the Gods, mead has been around for centuries and is possibly the world’s oldest alcoholic drink.
The History of Mead
One of the earliest references to fermented honey dates back 4,000 years, well before the Vikings, and the earliest written recipe for mead dates back to 1520 by the Archbishop Olaus Magnus, stating that “on the eight day it may be drunk, but the longer it is left, the purer and better it will be.” The traditional Viking mead recipe has stayed the same over the years, with the three main ingredients of honey, water, and yeast. With the beverage being fermented all across Scandinavia, added ingredients from local areas (or pillaged lands) created plenty of varieties. Mead can have anywhere between 8 - 20% ABV, be as sweet as honey or as dry and un-honey tasting as wine.
This easy-to-make alcoholic beverage was such a favorite for the Vikings, they even dedicated entire buildings to it. Viking mead halls were the central place for people to socialize, feast, drink, probably participate in Pagan rituals, and get killed by creatures like Grendel. Or if mead halls don’t make you think back to reading Beowulf in your British Literature class, the key takeaway is these halls were built for drinking. Drank in horns, cones made from rolled birch, and bowls passed around the hall for everyone to imbibe. Mead was so well loved that the Nordic people had a saga called “the mead of poetry” dedicated entirely to the drink. And in Norse mythology, Valhalla had a goat whose udders flowed a never ending stream of mead for Odin and his warriors.
Vikings Didn’t Have a Homebrew Supply Store, so How Did They Get These Ingredients?
Water, easy. Honey, available in the southern regions of Scandinavian countries. But yeast? Some strains were acquired from wild yeasts on fruits, flowers, and vegetables. One technique was setting a juniper or birch log out to dry and develop cracks, then put it into the bottom of a batch of mead - collecting yeast in its cracks. Unwashed fermentation vessels caked with yeast from previous batches were also used. The Cook’s Cook breaks down how you can Make Wild-Foraged Mead Like a Viking with just raw honey, water, raisins, and a couple squeezes of lemon or orange.
Traditional flavorings and additives included raspberries, elderberries, cherries, hawthorn berries, crabapple, rowan berries, and wildflowers including violets, dandelions, cover, and rose hips. For preserving effects and added flavoring, they also used cumin, pepper, cardamom, and hops. If you’re new to making mead or fermented beverages, a couple tips to remember is to only use the petals and not the greens (to avoid bitterness) and only forage from pesticide-free areas.
Another tip is to start simple with a basic mead recipe. You can experiment with all the additives you want, but mead boils down to just 3 ingredients and one of them comes from your tap - talk about easy. The other ingredients can be ordered online (you’re welcome) and don’t have to be foraged. You can learn how to get started with a basic mead recipe in our article on How to Make Mead at Home. For a slightly more complex take on a traditional Nordic mead, Dansk Mjod Viking Blod takes a mead recipe from 1700 and adds hops and dried hibiscus for a soft, citrus-like flavor and an aromatic and floral aftertaste. Below you will find our recipe so you can clone Viking blod mead at home.
Viking Blod Mead Recipe
Ingredients for a 6 gallon batch of Viking Blod Mead
- 5 gallons water
- 25 lbs honey
- .5 oz Centennial Hop Pellets
- 7 oz dried hibiscus
- 2 packets of Lalvin 71B White Wine Yeast
- 1 tsp of Wyeast Brewer Choice Yeast Nutrient (¼ tsp at four separate times)
- ¼ tsp Potassium Metabisulfite
- 2 ½ tsp Potassium Sorbate
- Make a hibiscus tea with 1.5 gallons of water. Bring to a boil then turn off and allow hibiscus to steep for 30 minutes.
- During this time, pour honey into the other 3.5 gallons of water.
- After 30 minutes, strain the hibiscus flowers from the pot and stir the tea into your honey water.
- Once the mixture reaches 70 degrees, pitch your yeast and add ¼ tsp of the yeast nutrient.
- At 24, 48, and 72 hours after pitching yeast, slowly stir mead and add ¼ tsp of yeast nutrient. Adding yeast nutrient will cause a reaction, be sure to have enough headspace for activity or use a blow-off tube.
- After two weeks, transfer mead to secondary and dry hop with 0.5 oz Centennial hops.
- Leave hopped mead for one week and transfer again.
- Additional transfers after this will allow dead yeast to settle out each time, prevent yeast autolysis (leading to off-flavors), and improve clarity.
- Stabilize mead with potassium metabisulfite and potassium sorbate.
- Bottle your mead and wait! Using smaller bottles allows for more testing as you wait months/years. Try a bottle at six months, one year, and two years. You’ll be amazed at the difference as the strong alcohol presence mellows and other flavors emerge.
For more tips, including how to back-sweeten your mead, check out our article 6 Secrets for Making Better Mead.