
What is Brew In A Bag?
For many extract homebrewers, going all-grain seems very intimidating. You might think that all-grain brewing requires way more equipment, more of your time, and an encyclopedia’s worth of brewing knowledge to make the leap. But, these things are just not true, thanks to Brew In A Bag; an easy way for extract and partial mash brewers to dip their toe into all-grain brewing. It’s also a helpful technique for all-grain brewers looking to trim some time off their brew day or play with new ingredients when brewing experimental small batches.
Brew In A Bag, or as it’s commonly abbreviated BIAB, is an easy homebrewing method for going all-grain without adding too many new pieces of equipment into your homebrewery or adding hours to your brew day. It can be done for smaller three-gallon batches on your stovetop using a strainer or colander, or full five-gallon batches outdoors using a pulley system to help lift the grain bag for draining (and save your back!). In hopes of easing new brewers into the BIAB method, we thought we’d do a basic breakdown on the process and the few pieces of equipment that you’ll need.
How is BIAB different from extract homebrewing?
You’re using 100% malt to create your wort, which allows you many new combinations of flavors and fermentation control by adjusting mash temperatures during the BIAB mash process.
How is BIAB different from three-vessel all-grain homebrewing?
In a typical all-grain setup, you have three vessels: a mash tun (holds the mash), a hot liquor tank (holds the sparge water) and a boil kettle (collects and boils the wort). In a BIAB setup, all three processes happen in a single vessel. The lack of a sparge step (which can take an hour or more) also reduces the overall time of a brew day.
Essentially, BIAB takes all-grain brewing, which includes mashing grains and running off wort, and treats the grist (total amount of malt) like steeping grains by fitting them all into one large bag instead of separate vessels. Think: all-grain brewing meets a giant tea bag.
What You Need to Get Started:
Double-Mesh Stainless Strainer - recommended for three-gallon stovetop BIAB
Locking Ratchet Pulley * - recommended for larger five-gallon BIAB setups
*Get everything you need bundled together in our Brew in a Bag Starter Kit
Small Scale: Stovetop Brew in a Bag
If you're brewing on your stovetop, we suggest brewing 3-gallon batch because a conventional stovetop is likely to be limited to a 5-gallon kettle due to both space and burner power. A 5-gallon kettle just isn’t large for the grain and the water you’ll need for a full 5-gallon batch of beer. Another reason you likely won’t want to do a full 5-gallon batch on your stovetop is that the grain bag becomes quite heavy, and holding that large of a wet grain bag over your kettle to drain makes for a pretty uncomfortable task.
You can dead-lift the bag and hold it out of the wort to drain for a few minutes or you can make life a bit easier by placing the bag in a double-mesh strainer across your kettle. While the BIAB method is built for no-sparge, some brewers will still do a quick sparge by hand, using a measuring cup or small saucepan to slowly pour hot water over the grain sack to extract even more of the sugars contained in the grain. But again, if you plan your malt bill accordingly, you can just let it drain and then toss or compost the grain.
Go Big: Brewing in the Garage
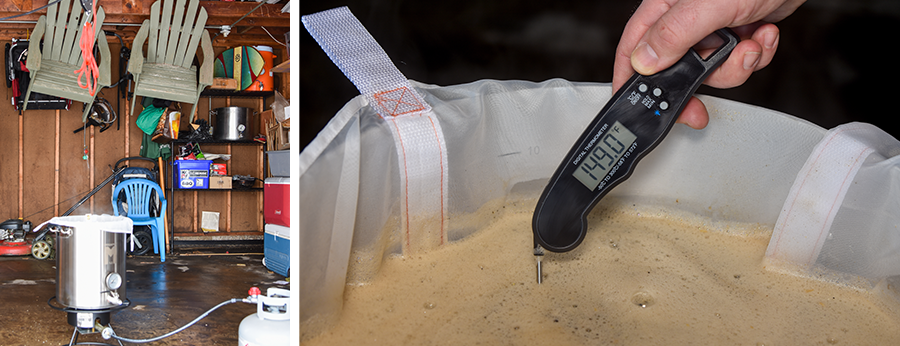
You can easily brew 5-gallon BIAB batches outdoors, in the garage, or in a basement brewery with a larger 10-gallon kettle and the use of a pulley. This is where our Brew in a Bag Starter Kit comes in very handy; it has everything you need bundled up and ready to rock. The pulley needs to be mounted to and hung from something solid and capable of supporting the weight limit of the pulley system, which is 250 lbs. A rafter or crossbeam in the garage is a perfect place to set this up. Once in place you then use the pulley to lift the bag, which will be quite heavy with wort-soaked grain, out of the kettle. The pulley system is a huge convenience and back saver.
Let’s look at how to Brew in a Bag on both the stovetop and full-volume pulley methods.
BIAB 101: How It’s Done
Regardless of volume and method, the first thing you need to do is figure out how much strike water you’ll need for your BIAB mash. Strike water is the term used for water to which grain will be added to create the mash. This no-sparge BIAB method relies on the proper amount of water, and each grain bill will be different depending on the total weight of grain. For a 5-gallon batch size, approximately 6.5 gallons of wort is the target for pre-boil volume when doing a 60 minute boil. To achieve this, you must take into account the amount of water that the grains will absorb. A great place to start is to assume that each pound of grain in the recipe will absorb approximately one pint (0.125 gallons) of water. In order to calculate the overall total water to heat for a 5-gallon batch, use this equation:
Water volume in gallons = [(Total grain weight in lbs) x 0.125] + 6.5
Please note that the equation is for 5-gallon batches. If you are brewing a 3-gallon batch with a pre-boil volume of 4.5 gallons, you’ll need to use this variation:
Water volume in gallons = [(Total grain weight in lbs) x 0.125] + 4.5
When you determine the amount of strike water needed, add that volume of water to your kettle and begin to heat it to your strike temperature. Strike temperature is the water temperature at which you add malt with the understanding that the temperature of the malt (likely stored at room temperature) will reduce the water temperature hopefully to your target mash temperature.
A rule of thumb is to heat your strike water to about 7-10 degrees higher than your target mash temperature. For example, Northern Brewer’s Ace of Spades Black IPA all-grain recipe kit (seen brewed in the photos of this article) calls for a mash rest temperature of 154F. So, when you brew this beer as a BIAB, you’ll heat your strike water to 161-164F.
Note: you can always add a bit of cold water to help bring temp down or heat to bring it up, but it’s always best to try to hit the mash temperature correctly the first time.

[Brew Bag lining 10 gallon MegaPot in a way as to avoid ball valve bulkhead and thermometer probe.]
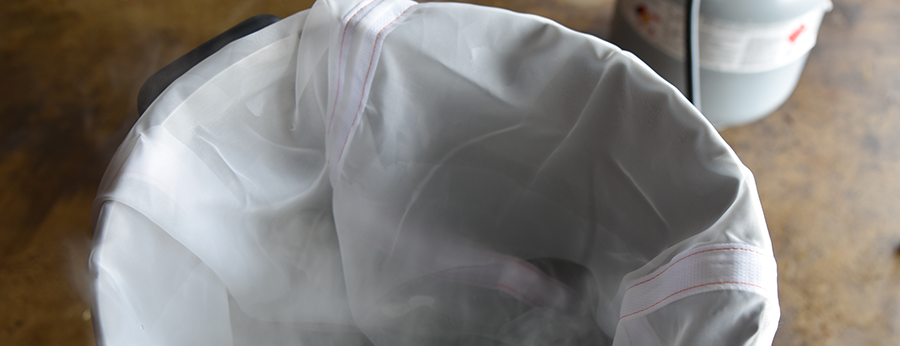
Once you hit your strike temperature, kill the flame or heat before putting the bag and grain into your kettle. Fit the brew bag completely inside the kettle with straps folded over the top rim of the kettle, and ensure the bag isn’t snagging on any fittings such as a ball valve bulkhead or thermometer probe. In our experience, it can also be helpful to put a few small clamps around the kettle’s rim to hold the bag in place. Not essential, just a helpful tip.
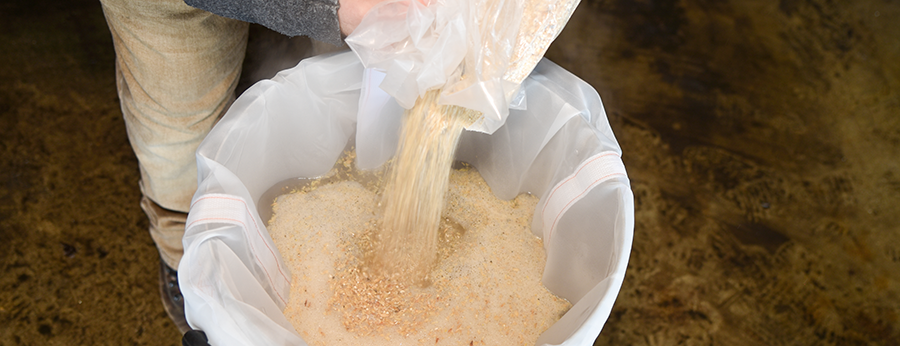
Once the bag is in the kettle, slowly pour in your crushed malt and stir to get the malt incorporated in the water. (If you don’t have a grain mill of your own, be sure to order the kit with milled or crushed grains. This is very important.) This process is referred to as “mashing in” or sometimes “doughing in.” You can do this in increments to prevent dough balls from forming. Dough balls are clumps of malt that tend to form in your mash when malt is added quickly or all at once. They are bad because they keep malt and water from being properly blended, thus hiding sugars from your mash. Leave no sugars behind - or hidden - bust up those dough balls!
Take a temperature reading of the mash. Hopefully you are spot on to your target mash temperature. If not add a bit of cold (or hot) water or add a bit of heat. If you do add heat, be sure to lift the bag up off of the bottom of the kettle just slightly to keep the bag from burning.
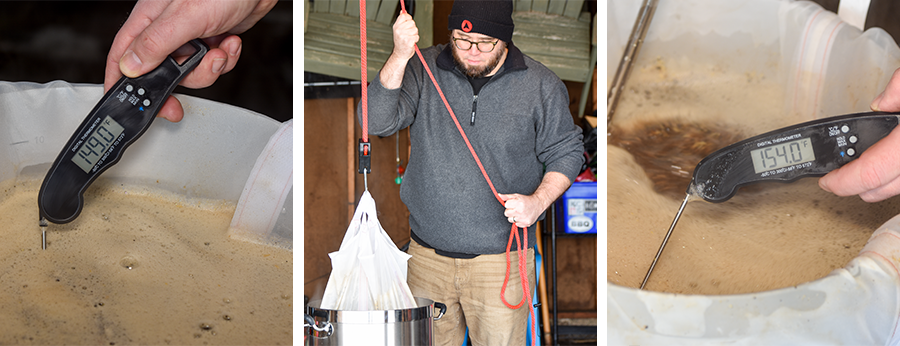
As you can see in the photos above, due to cold winter brewing conditions we came in a bit low. Our initial mash temperature after stirring all grains into strike water was 149F. While it’s true that a few degrees plus or minus aren’t a huge concern, this put us 5 degrees from our target mash temperature of 154F and we wanted to bump it up a bit. Using the pulley, lift the grain bag up just enough to bring it off the bottom of the kettle but not all the way out of the kettle. Add flame or heat and stir until the temperature is raised a few degrees. Once your target temperature is reached, kill the flame and carefully lower the bag back into the kettle.
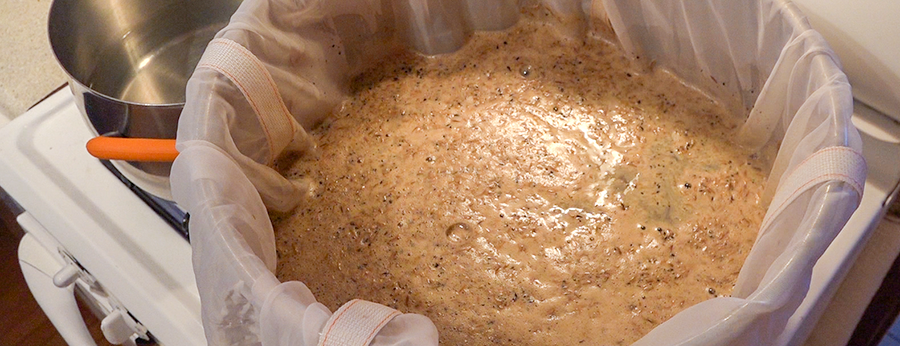
Cover the kettle and let it sit for the mash rest time according to your recipe to ensure full starch-to-sugar conversion, usually about 60 minutes. It’s a good idea to check on the mash and stir every 10 minutes or so to make sure the temperature hasn’t dropped; if it has, you can goose it with a bit of heat, but again, bring the bag off of the bottom of the kettle as you do this.
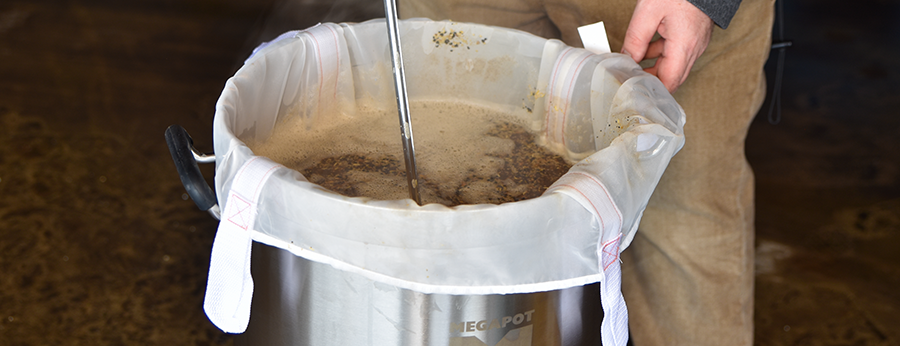
After your mash time has elapsed, it’s time to drain the grains. In a full-on all-grain system this would be the stage where you would sparge, or rinse the grain with a continual flow of water, to collect the sweet wort from the grains. BIAB makes this part of the process much easier by allowing the brewer to simply lift the grain sack out of the wort to drain. On a stovetop this can be done by hand, pulling the bag out and above the level of the wort, allowing wort to drip from the malt into the kettle.
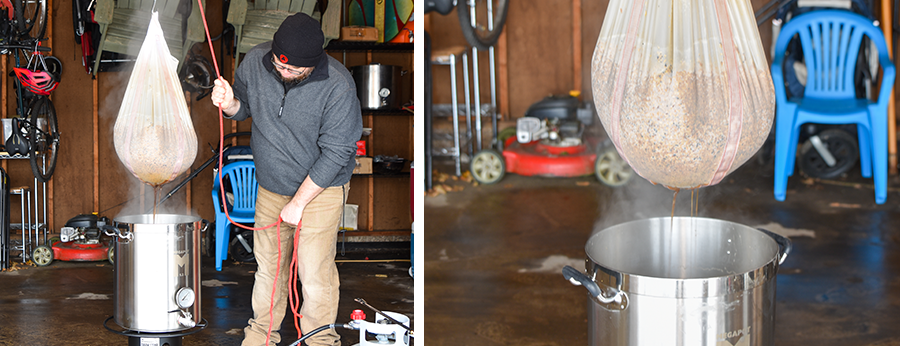
In the larger-batch pulley-assisted setup, you use the pulley. Gather the handle loops on the brew bag and slide them over the hook of the pulley. Take the slack out of the pulley rope to make sure the loops are secure, then slowly hoist the bag completely out of the kettle and elevate it above the surface of the wort to drip down into the kettle. This can take some time, but what do you care? The pulley is literally doing all the heavy lifting!
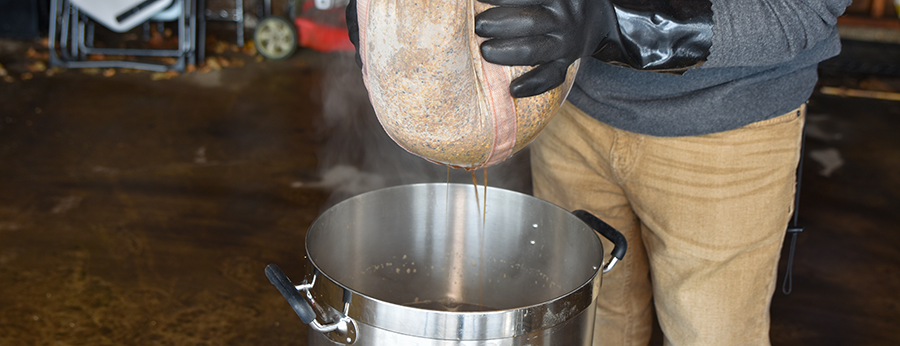
To help extract every little bit of fermentable sugars from the grain, we suggest you gently squeeze the grains. Wearing the heat-proof brew gloves that come with our BIAB Starter Kit, squeeze the warm, wet grains while slowly turning the bag to make sure you get to as many pockets of sweet wort as possible.
Because this is a no-sparge method, you can choose to ignore any sparge instructions on the recipe, as you should already have the proper pre-boil volume. If you don’t have the expected pre-boil volume, you can top up with tap water to reach the appropriate volume. While one of the benefits of BIAB is not having to sparge, some brewers will take 1/4 - 1/2 gallon of hot (~170F) water and slowly and carefully pour it over the bag just to help pull out even more of those sugars. This step is not necessary, but is a) one way to get a bit more involved in the advanced all-grain process and b) a way to get a larger volume in the kettle should you need it (instead of topping up with plain water).
With the bag now outside of the kettle, you can add a flame or heat and start heating the kettle up to a boil. Once the bag is completely drained, you can carefully lower it down and off to the side into a bucket or tub and then compost or toss the grains. It also might be safer to just wait until the end of your brew day to do this if you’re concerned about the hot kettle below. Proceed with the brew day as you would any other brew day, adding hops and other additions to the boil as noted in the recipe, cooling the wort, and pitching yeast.
Don’t let the idea of all-grain brewing keep you from trying it out. Brew In A Bag is a fairly simple process that gives you more control over your brewing and recipe development skills with minimal new equipment.